Showing posts with label card. Show all posts

Wednesday, 4 February 2015

A Glittery Post

Tonic Studios are just about to release their latest line....glitter and crystal drops! I've been having a lovely glittery time here in my craft studio experimenting with Tonic's new range of Nuvo Glitters. This necklace was made by gluing together 8 layers of card, the top layer is coated with glitter. You'd be surprised at just how rigid and strong card can be for jewellery making. I've topped mine with a layer of UVA cured resin, but you could just as easily use a 2 part epoxy resin, or even a dimensional glaze like Diamond glaze to finish off your piece.

To place the wire through the centre of the pendant, I cut the two central butterflies in half and then cut a thin sliver of card away so that when they were glued down, they created a channel for the wire. I place the wire in position before gluing the rest of the card sandwich down. I find Tonic's tacky glue is excellent for this job,
I also decorated a box...because...well, I love little boxes!
I used Tonic's new Nuvo Crystal Drops to add another pretty detail on the box.

The strip of glitter around the box was added using double sided sticky tape. The glitter sticks to it pretty well.

The top of the box was sealed with several layers of a gloss lacquer but in retrospect, I think it would have been good to use a resin too as I think the lacquer dulled the glitter a little. Do you like the way the glitter dragonfly is inlaid into the black glitter? I'll let you know how to do that in another glittery post soon. 

Well, I must get on...so many things to cover with glitter ;-)

Doda
x

Friday, 16 March 2012

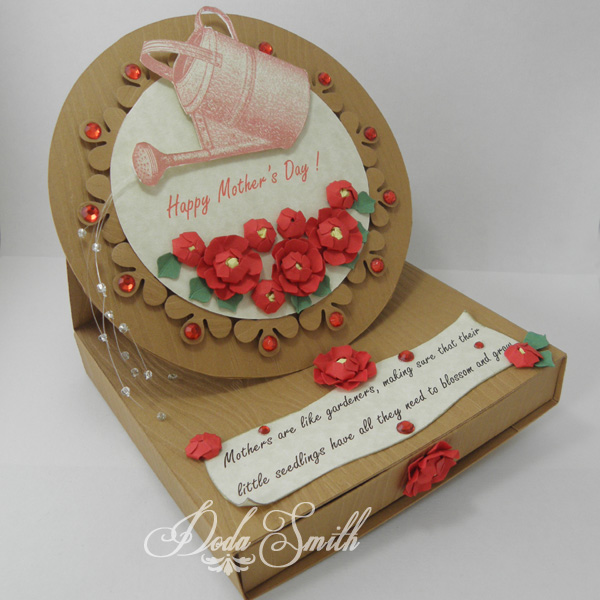
Easel card with extras

I added an extra bit to my easel card that I showed you how to make a couple of posts back. You can find it here.
Now you can make a card with a little drawer underneath to pop a little gift inside. If you would like the template for the box, you can download it here.
The "water from the can was made using beading thread and silver glass seed beads.  It might have been better to have the water actually going on the flowers - maybe I'll do that if I use that effect another time. Paper punches by Tonic Studios, Image from the "graphics fairy" Quote by me.

Wednesday, 16 November 2011

Making foiled flower decorations

Do you like the effect of these foil decorations on my greetings card? When you see them in person, they look like they have been foil printed onto the card because they are very smooth. Or perhaps they could even be peel offs. But no, they were much cheaper to make than that.
They started life as a roll of 3m Aluminium tape. The kind you use for DIY. All you need then are some flower punches. I've used my Tonic Studios flower punches here. 
All you need to do is punch out a few flowers and carefully peel off the backing paper- this is a bit fiddly- but worth it. Then apply to your card or scrapbook page smoothing it out carefully. Then use the bottom of a glass and rub in circular motion over the flower to burnish it to your page- this removes any catchy bits. For the finishing touch use a sharpish pencil and draw in lines and designs however you want the flower to look. I think the finished result is very satisfying.
For this one I used one of my Petal Pairs punches and a heart punch to make a leaf shape.
Believe me, you can get a whole lot of flowers out of one roll of tape. And you can use so many different punch shapes with this technique. Just try to keep to ones that are not too fiddly. 
Have fun, and let me know if you try this. 

Wednesday, 31 August 2011

cart before the horse

I'm slowly working myself up to doing some serious crafting, but I have a strange back to front way of doing things. I like to get all my little boxes ready before I start making the jewellery to put in them.
Actually I find it quite therapeutic to cut, score and stick. Now I am in the mood to try my hand at a little notebook or some other paper items . 
My other job for today is to embroider my little girls name onto a plain black fabric bag I have so that she can use it at school for her gym kit. Exciting stuff!


PS. Last chance to enter my blog giveaway ...drawing is tomorrow.